
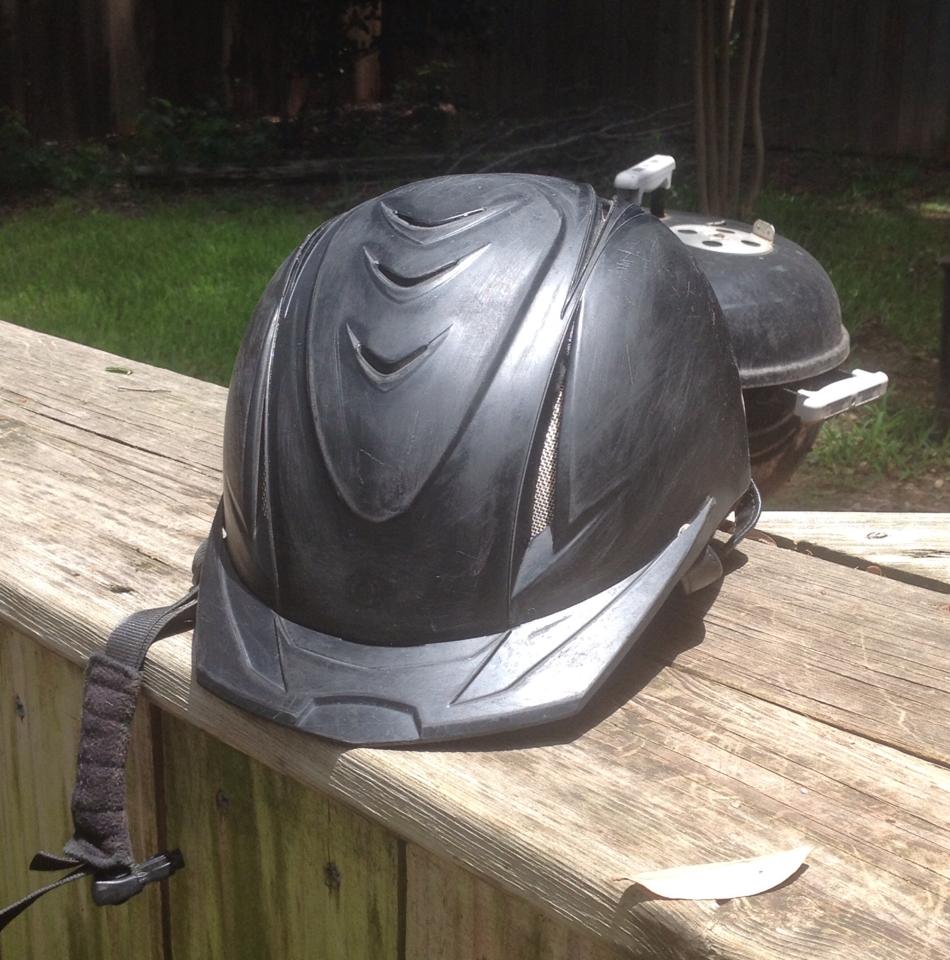
I knew when I saw the Pimp my Helmet DIY on Shadbelly that this was a project I simply couldn’t pass up. The timing was absolutely perfect. I had just dragged out my “summer helmet” from the depths of my spare trunk – a lightweight, easy to clean Ovation Schooler. Our summers are so hot and gross, subjecting a really nice GPA Speed Air to that kind of mess just isn’t desirable. Poor Ovation was looking kind of sad though. Between all the errant tree branches on trail rides, being crammed into random tight places in my trunk/car, dragged along who-knows-what, and everything else that may have happened to it over it’s past two summers, it was looking pretty darn sad. Lots of little scratches all over it. I swear I haven’t fallen in it yet but it sure looked like it.

So when I saw the DIY instructions I absolutely had to try it. As in, right now. I brought my helmet home from the barn, stopped at Home Depot on the way, then got to work. I have to admit – I am NOT as patient as Shadbelly was. My whole project took less than 2 hours start to finish including all the wait time for drying in between coats. Let’s face it, I’ve never been good at leaving things alone. Good news is – it worked great anyway. Also good to note: there are FOUR metallic brown Rust-Oleum Universal colors. We won’t talk about how long it took me to pick one. I walked in thinking “I’ll get brown!” and stood in the aisle gobsmacked for way too long. Just sayin, be prepared for too many options.

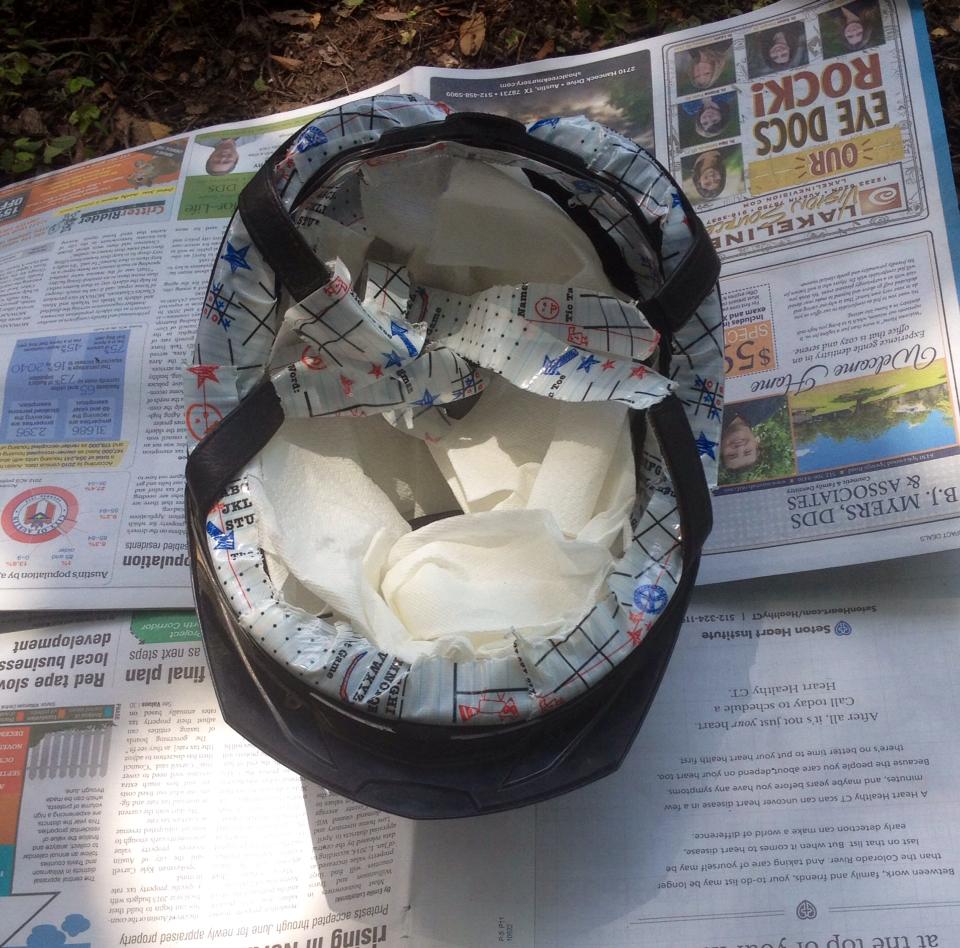
First I took the Ovation decals off the helmet and gave the whole thing a very light sanding, just a few swipes with fine grit sandpaper. The scratches sanded out amazingly easily, I guess they just looked a lot deeper than they really were. Then I cleaned it, wiped it down with a rag, and set it outside to dry while I prepared the rest of my supplies. In my daze of trying to find just the right brown at Home Depot I had forgotten to grab painters tape. The only other two options in the house were a little bit of leftover scotch tape from Christmas present wrapping and a small roll of duct tape I got in my race packet at the 3M half marathon. Thanks 3M – your weirdly patterned duct tape finally went to good use.
Sanded and cleaned
All taped up and ready to go
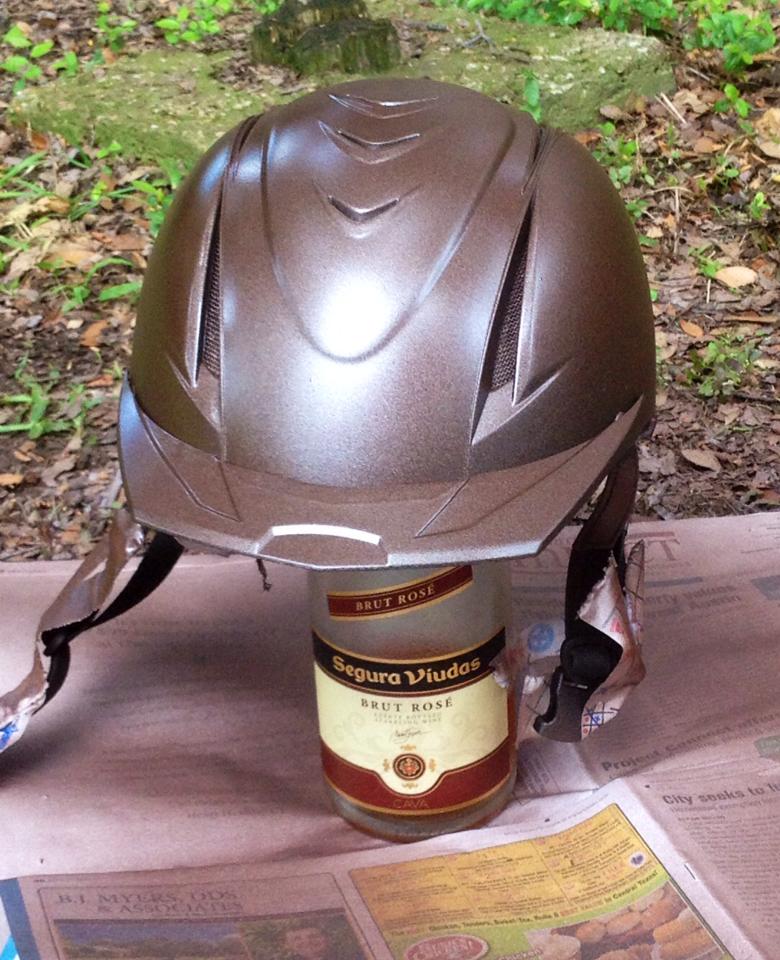
I taped over all the edge fabric and nylon harness strap that I didn’t want painted, set out some newspaper in the backyard, grabbed a wine bottle (to set the helmet on, not to drink) and got to work. I was a little timid for the first coat, barely misting anything on. Then I stood back, looked at it and went “OMG this is totally gonna work!” and did the first coat. A few minutes later I came at it again for the second coat, although now I was a little cocky and heavy handed. I sprayed a little too much on one of the vents and clogged a couple of the teeny holes in the mesh, so I ran inside for a toothpick to poke them clear. Crisis averted. Then I waited a few more minutes (remember how I said I was impatient?) and did the third coat, then finally inspected it closely and did touch-ups to make sure it was all even.
First coat, hanging out on the wine bottle
Sitting out to dry after the third coat
Dried and tape removed!

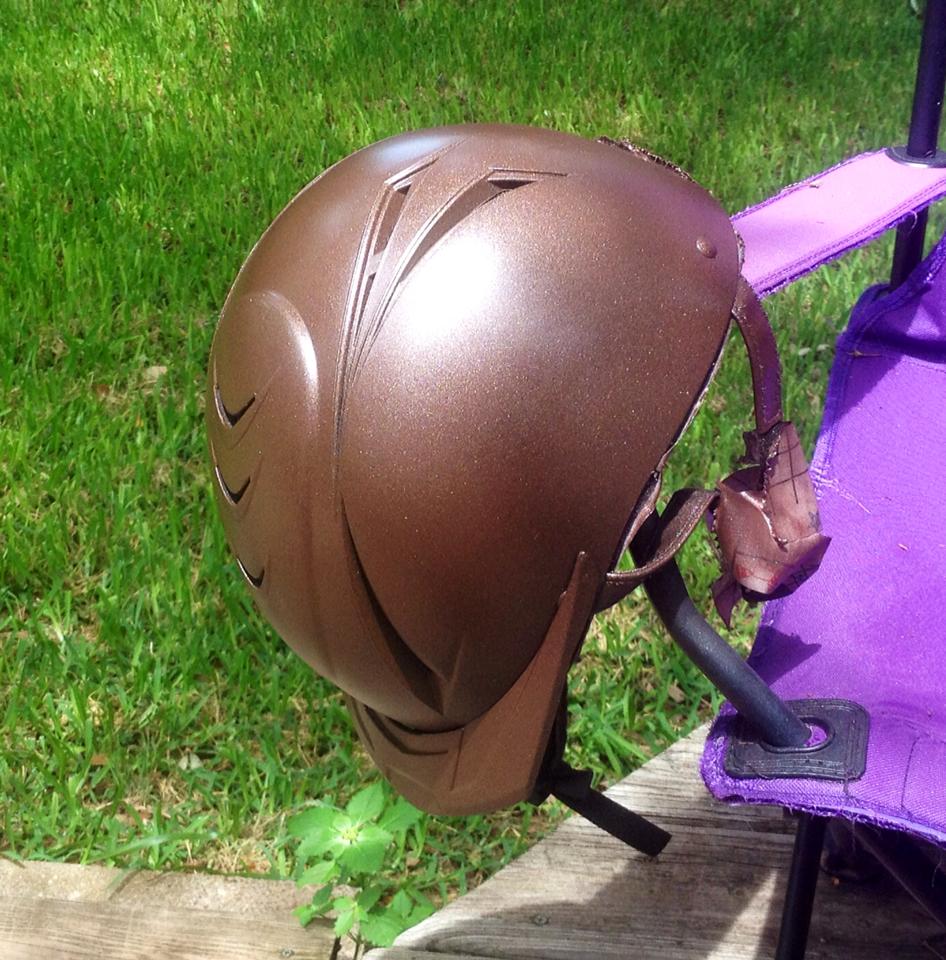
I let it dry for about half an hour, then slapped my new Personally Preppy helmet monogram on it, and voila – done. It looks brand new! And it goes with my brown boots! You really would never know this was spray paint, it just looks like any other regular plastic helmet finish. I still can’t believe how easy this was and how well it worked… it gets two solid thumbs up from me. Thanks Shadbelly!
Final product


That looks awesome, I would have never thought to spray paint a helmet!! Good to know 🙂
LikeLike
I know, now I’m scheming about what else I can paint…
LikeLike
Looks great!!
LikeLike
Thanks!
LikeLike
Oh dang. That is hot!
LikeLike
Pretty cool!
LikeLike
You, darling, are a bloggers dream! We are so very, [wipes tear] very proud!
LikeLike
I’m living proof that any idiot can do it. 😉 Thanks for being the trailblazer!
LikeLike
Very cool! I love it.
LikeLike
Good thing it’s not navy, or you would only be able to wear it in the jumpers. 😉
LikeLike
LOL. Ah, Instagram arguments with 12 year olds. Classic.
LikeLike
How cool! I love it!
LikeLike
Looks awesome! Love it!
LikeLike
Very cool! It turned out great!
LikeLike
Looks fantastic! Very neat!
LikeLike
This is SO clever! This is, like, get a separate XC cheap helmet (I ❤ the Ovation schoolers!) and paint it in my colors kind of clever. 🙂 It looks WONDERFUL!
LikeLike
Wow so clever!! I wish I had a second helmet to play with now!
LikeLike
That will look so good with those coveted brown boots!!!!
LikeLike
Now THAT is cool!!! You have to show pics of you all dressed up with it on!
LikeLike
Wow! That look great!!!!!!
LikeLike
Love it! So cool!
LikeLike
I love it!!! You are so handy 😉
LikeLike