
I think I promised this one to several of you a long time ago, but I finaaaaally just got around to it. Oops, sorry. Trying to play catch-up this month!
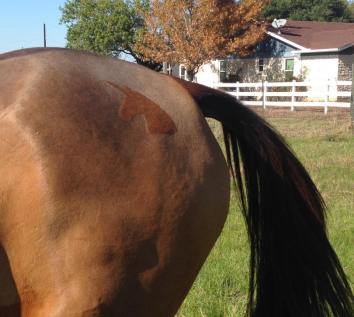
If you follow me on Insta you probably noticed one of the approximately 4000 pictures I posted of Henry’s butt from the jog-ups in Arizona. He sported an anchor, for our trainer’s barn, Anchor Equestrian. I love customized/unique quarter marks, outside of the standard checkerboard or sharks tooth pattern. I did, after all, put a unicorn on my horse’s butt for AEC’s last year.
I made the original anchor stencil very hastily the day before we left for AZ. I didn’t really have the materials I wanted, nor did I have any clue if my sizing was right, so I just made it out of thick paper. Of course, when you put a damp brush on paper, it doesn’t last long. The stencil made it through AZ, but got left behind in the trash can. I liked the anchor though, so I set out to make a more permanent, longer lasting version.
What you need:
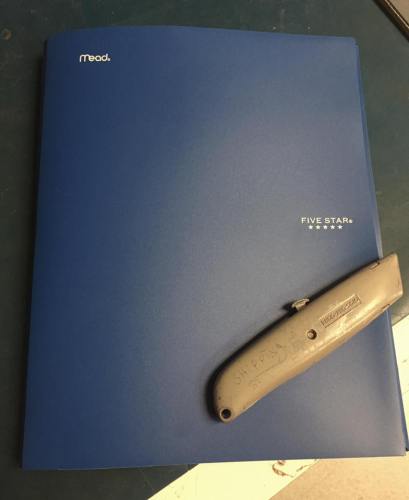
- Some kind of thin plastic. I cut up a plastic folder that I bought for a whopping $1, but any plastic that is thick enough to hold it’s shape and thin enough to cut with a box blade/x-acto knife will work. I’ve used a broken rubbermaid bin before.
- a box blade/x-acto knife for cutting
- a printer
- a pen
- a surface on which to cut. I have a couple cutting mats (I have no idea how things like this find their way into my life) but otherwise just find a sacrificial surface. The garage floor, a bunch of newspaper, whatever. Or spend $5 and get a cutting mat, which makes things a little easier and smoother. Your call.
I have all of these things lying around except for the plastic folder, so my total investment here was $1 and about 10 minutes of my time for 2 stencils. My stencil is obviously fairly basic… the more elaborate you get with the pattern, or the more curves you have, the more complicated it gets.
My first step was cutting the folder down to a usable piece of plastic. It was simple, I just flayed the pockets off, cut the middle binders off, and ta-da – two perfect pieces.

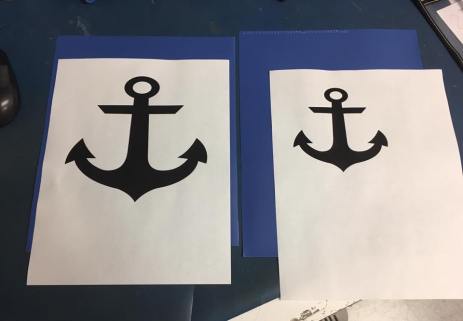
Then I was off to Google image search to find exactly the right shape. You can do just about anything you want, even freehand (if you’re more artistic than I am). Just remember – this is going on a horse’s butt by way of a damp brush, so if you try to get super elaborate, not all of the detail will show up in the end.
I printed two – a larger anchor the same size as the prototype I’d already made, and then a smaller one.
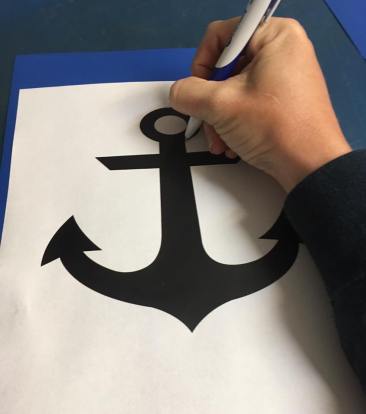
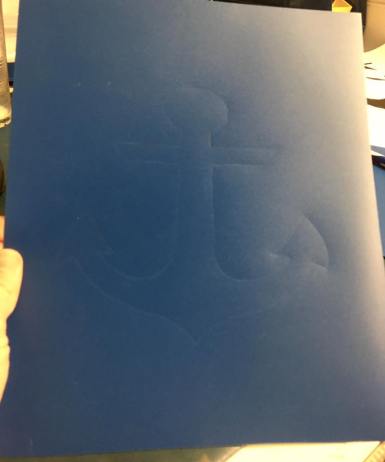
Your method for getting the pattern onto the plastic is personal choice. Trace paper works fairly well, especially if your plastic is lighter colored. I am more of a bull-in-a-china-shop type, so I just take a pen and trace firmly around the edges of the pattern, leaving an impression in the plastic.
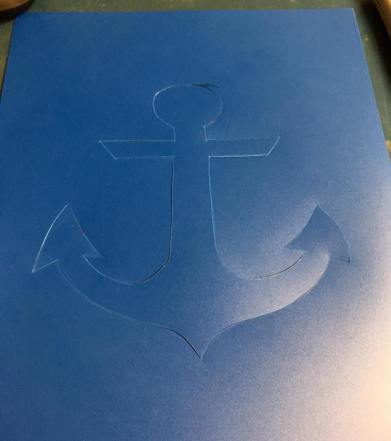
Next up is the fun part – cutting. I should probably have some kind of disclaimer about adult supervision, how razor blades aren’t toys, blah blah blah. Just don’t cut your damn finger off, ok? It’s pretty simple, just follow your lines. I don’t really worry about getting everything exactly symmetrical… it’s going on a horse’s butt, after all. Get it reasonably close and stop obsessing, no one will be able to tell once it’s on.
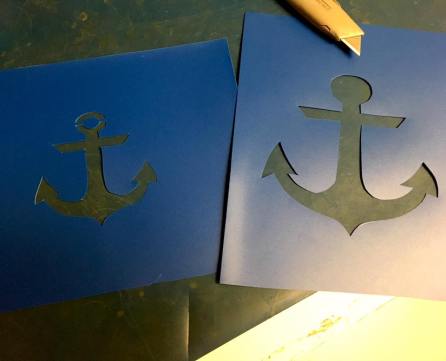
I did my two stencils slightly differently, to show you what to do if you have a non-cutout area within a larger cutout. For my bigger stencil I just made the top part of the anchor into one big circle, without an inner circle.
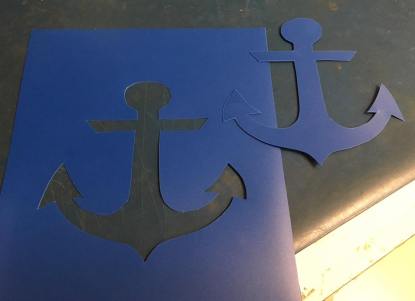
For the smaller stencil I left the inner circle at the top of the anchor. This isn’t rocket science… just leave a couple of little “connecting” pieces attached to the inner part. Definitely plot these out and draw them on before you start cutting so that you don’t accidentally forget one. Once the quarter mark is on the horse you can just go touch up the little lines where the connecting pieces were.
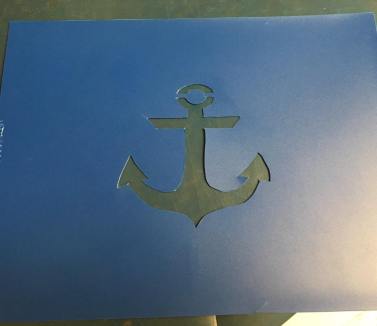
Once you’re done cutting you just pop the inner parts out and voila – you’ve got a waterproof stencil! Extra bonus: if you body clip in the winter, keep the cutout part as a template for a clipped-on quarter mark. Put some double-sticky tape on the back of it, tape it on where you want it, and clip around it. Really easy.
When you’re ready to use your stencil, brush the hindquarters with a damp brush (a shorter, stiffer one works best), then line the stencil up where you want it and brush downward over the stencil. Lift the stencil off, being careful not to drag it across your fresh quarter mark, and you should have your perfect pattern.

So cute! I love quarter marks too-I wish they were more commonplace in regular Dressage. Eventers get to do all the fun stuff!
I sold a cute little hunter pony to a 12-year old girl a few years ago, and it was her first horse so I wanted to make it really special. Before delivering him to her barn I shaved stars all over his butt (it was spring so his coat was the perfect length for a fun clip). I started out using a stencil for them but it was a paper stencil and didn’t work great. I ended up free-handing it. Luckily pony stood still for me and it turned out really cute…and the girl loved it. Wish I had thought of transferring the pattern to plastic like this though!!
LikeLike
Great tutorial! We have a team dressage competition every summer and next year I may need to incorporate matching quarter marks that match the team theme!
LikeLike
oooh the plastic is a good idea… someone is getting something on their butt this winter…
LikeLike
This may have to happen… Especially the “Butticorn”
LikeLike
Love it! Maybe I’ll get creative one day and do this?
LikeLike
Ohhhhh the leftover cut out to use as a trace for a body clip! Never thought of that. Now to find something neat to put on my horse’s butt…
LikeLike
Long live Butticorn
LikeLike
So what you’re saying is that I need to add butt templates to my shop for people prone to slicing their fingers off… what’s the keyboard shortcut for the emoji of the devilish grin?
I totally plan on having a spa day with the Archer and braiding him and making his butt fancy, so I appreciate the inspiration!
LikeLike
There’s an entire shop/business in the UK dedicated to them, so yes I think you should start making some and selling them! It’s hard to find anything other than the basic checkerboard/pinwheel/diamond patterns here.
LikeLike
Interesting! Usually, you do not see quarter marks here in Austria, but I somehow like them 🙂
LikeLike
Clever use of materials! Also I could have sworn you have previously claimed to be non crafty?!?
LikeLike
Razor blades and folders don’t count as crafty.
LikeLike
I am going to steal your idea but in reverse. When I body clip my guy, I always leave a wine glass on his butt (his show name is Moscato) but I always used a cut out of printer paper and had to remake it every year. It looks super cool-I I wish I could post a picture, And added bonus it used to make my trainer very unhappy in my former hunter princess life…my event buddies loved it though!
LikeLike
What a great idea! Thanks for sharing 😀
LikeLike